Welcome to the ultimate guide on midface rejuvenation! If you are considering enhancing your facial contours or restoring lost volume, understanding the exact science behind the procedure is essential. Here at The Cheek Filler , we believe that an informed patient is an empowered patient.
Getting dermal fillers isn’t just about adding volume; it is a highly customized art form that relies heavily on anatomical precision. A skilled injector doesn’t just look at your face and start injecting. They map out specific cheek filler injection points tailored to your unique bone structure, fat pads, and aesthetic goals.
Let’s break down everything you need to know about injection points, facial anatomy, safety zones, and how experts achieve those beautifully natural, lifted results.
What Are Cheek Filler Injection Points?
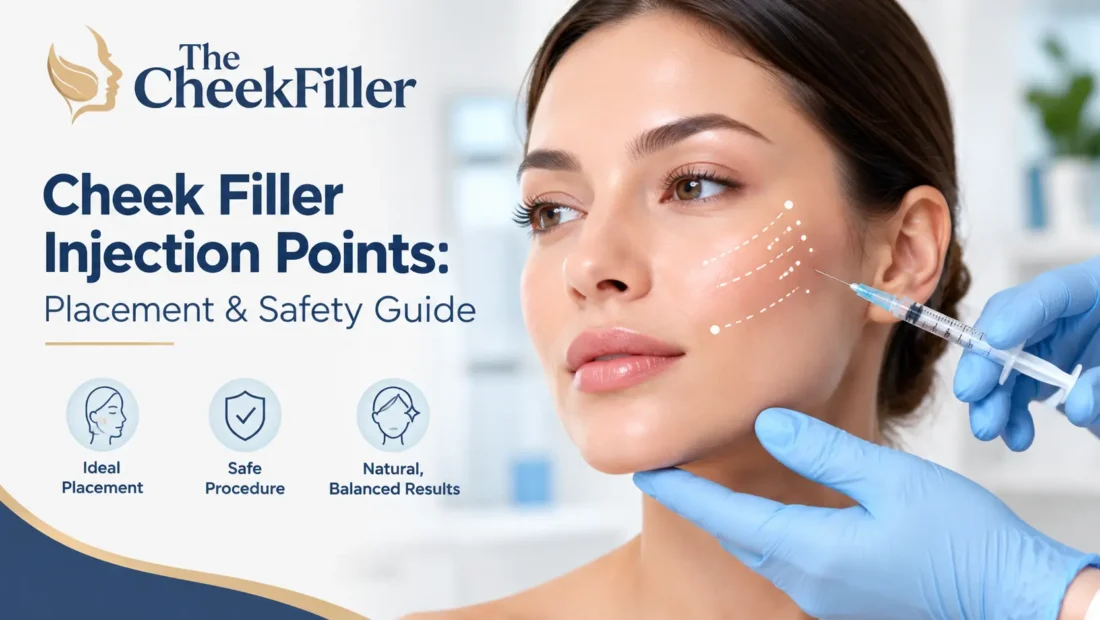
Cheek filler injection points are specific, anatomically mapped locations on the midface where dermal fillers are strategically placed to lift, contour, and restore lost volume.
Rather than injecting product randomly into the cheek area, experienced aesthetic providers use these targeted coordinates to rebuild the structural foundation of the face. By placing hyaluronic acid (HA) or biostimulatory fillers at these precise intersections, injectors can mimic the look of natural bone structure, support sagging superficial fat pads, and create a youthful, balanced profile without making the face look puffy or overfilled.
Cheek Anatomy That Determines Filler Placement
A beautiful result comes down to respecting the natural architecture of your face. Your injector must navigate several distinct anatomical layers to place the product correctly.
The Zygomatic Bone and Arch
Your cheekbone, formally known as the zygomatic bone, provides the hard framework for the upper face. The zygomatic arch extends horizontally toward the ear. Injecting deeply along this bony foundation is what creates that coveted “snatched” or highly contoured look, giving the illusion of higher, more prominent cheekbones.
Malar Fat Pads
These are the superficial fat pads sitting just beneath the skin. In our youth, they sit high and tight, giving the cheeks a plump, apple-like appearance. As we age, gravity and collagen loss cause these pads to slide downward, contributing to heavy smile lines (nasolabial folds). Filler can be used to visually reposition and support these descending fat pads.
Deep Medial Cheek Fat
Beneath the superficial fat lies the deep medial cheek fat. This structural fat pad is one of the first areas to deflate as we age, leading to a hollow, tired look under the eyes. Volumizing this deep layer provides a crucial foundation that lifts the entire midface.
Retaining Ligaments
Think of retaining ligaments as the structural “anchors” that attach your skin to the underlying bone. The zygomatic retaining ligaments hold the cheek tissues in place. Strategic filler placement around these ligaments helps tense the skin, providing a visible lifting effect to the lower face.
Main Cheek Filler Injection Points and What Each One Does
There is no one-size-fits-all approach to midface filler. Providers customize their technique using a combination of primary injection zones.
- Lateral Cheek (The Contour Point): Placed high and far back along the zygomatic arch. This point is essential for creating a lifting effect that pulls the midface tissues upward and outward. It sharpens the facial silhouette.
- Central/Apex (The Apple of the Cheek): Located at the most prominent point of the cheek when you smile. Injecting here restores youthful projection and fullness, softening a flat or tired appearance.
- Anterior and Medial Cheek (The Front Cheek): Placed closer to the nose, right beneath the under-eye area. This point addresses the deep structural volume loss that causes the face to look sunken.
- Lateral Lid-Cheek Junction: This delicate area bridges the outer corner of the eye and the upper cheekbone. A small amount of support here blends the transition between the eyes and cheeks, reducing the appearance of a skeletal orbital rim.
- Submalar/Inferior Region (The Hollows): Located below the prominent cheekbone. Adding soft volume here corrects the gaunt, sunken hollows that can make a person look older or fatigued.
How Many Injection Points Are Needed Per Side?
You might be wondering exactly how many pokes it takes to achieve your dream results. The reality is that it completely depends on your facial anatomy and the degree of volume loss.
Typically, most patients require somewhere between three to six injection points per side. A younger patient looking for a subtle “model contour” might only need two strategic points along the lateral cheekbone. Conversely, a mature patient seeking comprehensive midface rejuvenation to correct hollowing, support the under-eyes, and lift the jawline will likely require a multi-point approach across the medial, central, and lateral cheek zones.
How Injection Points Change Based on Your Goals
Your aesthetic goals dictate the roadmap your injector will follow. Here is how the strategy shifts based on what you want to achieve:
- For Lift and Contour: The focus heavily shifts to the lateral cheek and zygomatic arch. By placing firm structural filler deep onto the bone on the outer edges of the face, the tissues are pulled taut, creating a sharp, upward sweep.
- For Volume Loss and Anti-Aging: The strategy centers on the deep medial cheek fat and submalar hollows. Restoring this central facial volume acts like inflating a deflated balloon, softening shadows and rounding out the midface.
- For Tear Trough Support: Instead of injecting directly under the eye, skilled providers often start by injecting the medial cheek points. Building up the cheek foundation directly beneath the tear trough provides support for the under-eye area, often fixing dark circles without needing filler in the delicate eye region itself.
- For Balancing the Midface: To harmonize facial proportions, the injector will assess the width of your face and the projection of your chin, using central and lateral points to create a perfect heart-shaped or oval balance.
Male vs Female Cheek Filler Injection Points
Facial aesthetics are highly gender-specific, and the injection approach must reflect that to maintain natural harmony.
The Female Approach
Feminine cheek augmentation typically focuses on creating the “ogee curve”—a soft, youthful S-shaped curve seen from a 45-degree angle. Injectors emphasize the apex (the apple) of the cheek and blend it smoothly upward toward the lateral cheekbone. The goal is soft volume, high projection, and rounded contours that reflect light beautifully.
The Male Approach
Male midface rejuvenation requires a much more conservative and angular approach. Men generally have flatter, wider cheekbones. If an injector uses female injection points on a male patient, it can feminize the face by making the cheeks look too round or “chubby.” Instead, male injection points are kept lower and more lateral. The goal is to build a strong, chiseled, angular structure along the outer cheekbone while keeping the front of the cheek relatively flat to maintain a masculine silhouette.
Injection Depth and Layers: Why Placement Depth Matters
Where the filler sits beneath the skin is just as important as the point on the map. Depth dictates both safety and the final aesthetic outcome.
- Supraperiosteal (Deep on the Bone): When the goal is structural support and lifting (like along the cheekbones), the injector places a thick, robust filler deep down, right above the bone. This mimics actual bone structure and prevents the filler from moving.
- Subcutaneous (Superficial Fat Layers): When the goal is softening hollows or smoothing the transition between the cheek and the lower face, a softer, more flexible filler is placed in the shallower fat pads.
Injecting a thick filler too superficially can result in lumps, bumps, or a heavy, unnatural look. Injecting a soft filler too deeply will yield no visible lift.
Cannula vs Needle for Cheek Filler Injections
There is a long-standing debate in aesthetic medicine about the best delivery tool for cheek filler. Both have unique advantages.
- The Sharp Needle: Needles are highly precise. They allow the injector to pass through tissues quickly to place firm boluses (small mounds) of filler deep directly onto the bone. Needles are generally preferred for the lateral cheekbone where sharp, targeted contouring is needed.
- The Blunt-Tip Cannula: A cannula is a flexible, hollow tube with a rounded tip. Because it is blunt, it pushes blood vessels aside rather than cutting through them, significantly reducing the risk of severe bruising and vascular complications. Cannulas are highly favored for the medial cheek and submalar hollows, where smooth, fanned-out layers of volume are required.
HMP Global Learning Network
Many top-tier injectors use a hybrid approach: needles for deep lateral structure, and cannulas for soft central blending.
Cheek Filler Danger Zones and Safe Zones Explained
The face is a highly vascular area, packed with complex networks of arteries and nerves. Knowing the “danger zones” is what separates a master injector from a novice.
- Infraorbital Artery: Exiting a small hole in the skull just below the eye, this artery supplies blood to the lower eyelid and upper cheek. It is a massive red flag zone. If filler enters this artery, it can travel backward toward the eye, causing severe complications.
- Angular Artery: Running up the side of the nose toward the inner corner of the eye, this artery is in the crosshairs when injecting the medial cheek and nasolabial folds. Providers must maintain a safe distance from the nasal sidewall to avoid it.
- Lid-Cheek Area and Upper Cheek: The transverse facial artery and branches linking to the ophthalmic artery sit in this region. Shallow injections here carry higher risks.
Safe zones generally refer to the deep planes along the lateral zygomatic arch, where major vessels are less densely populated. However, true safety relies entirely on the injector’s depth control and anatomical knowledge.
How Providers Reduce Cheek Filler Injection Risks
Patient safety should always be the absolute highest priority. Expert providers utilize several specialized techniques to mitigate risks:
- Slow Injection Speed: Injecting the product slowly and with low pressure prevents the filler from being forced into a vessel.
- Micro-Volumes: Placing tiny amounts of product at a time ensures that even if a vessel is near, it won’t be overwhelmed by a massive bolus of gel.
- Aspiration: Some injectors pull back slightly on the syringe plunger before injecting. If blood enters the syringe, they know they are in a vessel and will immediately reposition.
- Anatomical Mapping: Highly trained providers mentally map the arteries, often feeling for a pulse in the danger zones before the needle ever touches the skin.
Vascular Occlusion: Warning Signs and When to Seek Urgent Care
A vascular occlusion occurs when filler accidentally enters a blood vessel or compresses it from the outside, blocking blood flow to the skin or eyes. While rare, it is a medical emergency that requires immediate reversal with an enzyme called hyaluronidase.
Warning Signs Include:
- Blanching: The skin turns stark white or gray immediately during or after the injection.
- Severe, Disproportionate Pain: A deep, throbbing ache that extends beyond normal injection discomfort.
- Coolness to the Touch: The affected skin feels noticeably colder than the rest of the face.
- Mottled Skin: A purplish, net-like bruising pattern that develops hours after the procedure.
If you experience any of these symptoms, contact your provider immediately. Time is of the essence to restore healthy blood flow.
Common Side Effects and Complications After Cheek Filler
Beyond the rare risk of occlusion, there are standard, expected side effects that accompany almost any injectable treatment.
- Swelling and Tenderness: The cheeks will feel tight and slightly sore for a few days.
- Bruising: Especially common if a needle was used. Bruises can range from tiny pinpricks to larger discolorations that take a week to fade.
- Asymmetry: Mild unevenness is common in the first two weeks as swelling settles at different rates on each side of the face.
- Lumps or Bumps: You may feel the filler beneath the skin. As long as it isn’t visible, this is normal and will integrate into the tissue over time.
What to Expect During Your Cheek Filler Appointment
Walking into your appointment knowing exactly what will happen helps eliminate anxiety. Here is the general flow of a professional cheek enhancement session:
Marking and Consultation
Your provider will have you sit completely upright. They will evaluate your face from multiple angles, discuss your goals, and literally draw a roadmap on your cheeks with a white cosmetic pencil.
Numbing
Most clinics apply a high-grade topical numbing cream for twenty to thirty minutes. Furthermore, almost all modern HA fillers contain lidocaine (a local anesthetic) mixed directly into the gel, meaning the area grows increasingly numb as the treatment progresses.
The Injection Process
Your provider will begin methodically treating the mapped points. You will feel pressure, a slight pinch, and perhaps a strange “crunching” sound if they are injecting deep onto the bone—this is entirely normal. The actual injection time usually takes less than fifteen minutes.
Recovery and Bruising Timeline
You will see immediate results, but remember that the initial look includes swelling. The swelling peaks around day two or three, and bruising may surface. By week two, the product will have seamlessly integrated into your tissues, revealing the final, beautiful contour.
Who Is and Isn’t a Good Candidate for Cheek Filler
Cheek filler is highly versatile, but it isn’t the right solution for everyone.
You are a great candidate if:
- You have age-related midface volume loss and flattening.
- You have naturally flat cheeks and want more angular definition.
- You want to softly lift early signs of lower-face sagging.
- You are in good general health with realistic expectations.
You might not be a candidate if:
- You have severe skin laxity (heavy sagging). Filler cannot replace a surgical facelift. Adding too much filler to sagging skin just results in a heavy, distorted face.
- You are pregnant or breastfeeding.
- You have an active skin infection or severe acne in the treatment area.
- You suffer from certain autoimmune or bleeding disorders.
How to Choose a Qualified Cheek Filler Injector
Because the midface is a complex vascular web, your choice of provider is the single most important decision you will make. Do not bargain hunt for your face.
- Verify Credentials: Look for Board-Certified Dermatologists, Plastic Surgeons, or highly credentialed aesthetic nurses (RNs, NPs) who specialize specifically in facial injectables.
- Review Portfolios: Look at their before-and-after photos. Do their patients look natural? Do they have experience treating your specific face shape and age demographic?
- Questions to Ask: During your consultation, ask them about their protocol for vascular occlusion. If they do not have hyaluronidase (filler dissolver) on hand and a strict emergency protocol, walk out the door.
Written and reviewed by the aesthetic content team at The CheekFiller | Last updated October 2026
AI tools assisted with the initial draft. Our team reviewed and edited the content for clarity, accuracy, and reader usefulness.
Considering treatment?
Browse injectors in our directory and compare their training, treatments and location before you book a consultation.